Report Filters
After creating a report definition and then generating a report in Planning, you can apply filters to the fields within any template that has been incorporated as Primary Data. These filters allow you to only see items that meet the criteria that you specify. Member Campuses have utilized filters to answer questions like these—and many more.
How many strategic objectives for this review cycle still aren’t marked complete?
Are there any units that haven’t yet reported on their use of results?
Which units are using indirect assessment methods?
How many goals has the Academic Success Center unit identified this year?
Which units have included the words continuous improvement in their assessment plans?
Applying Filters
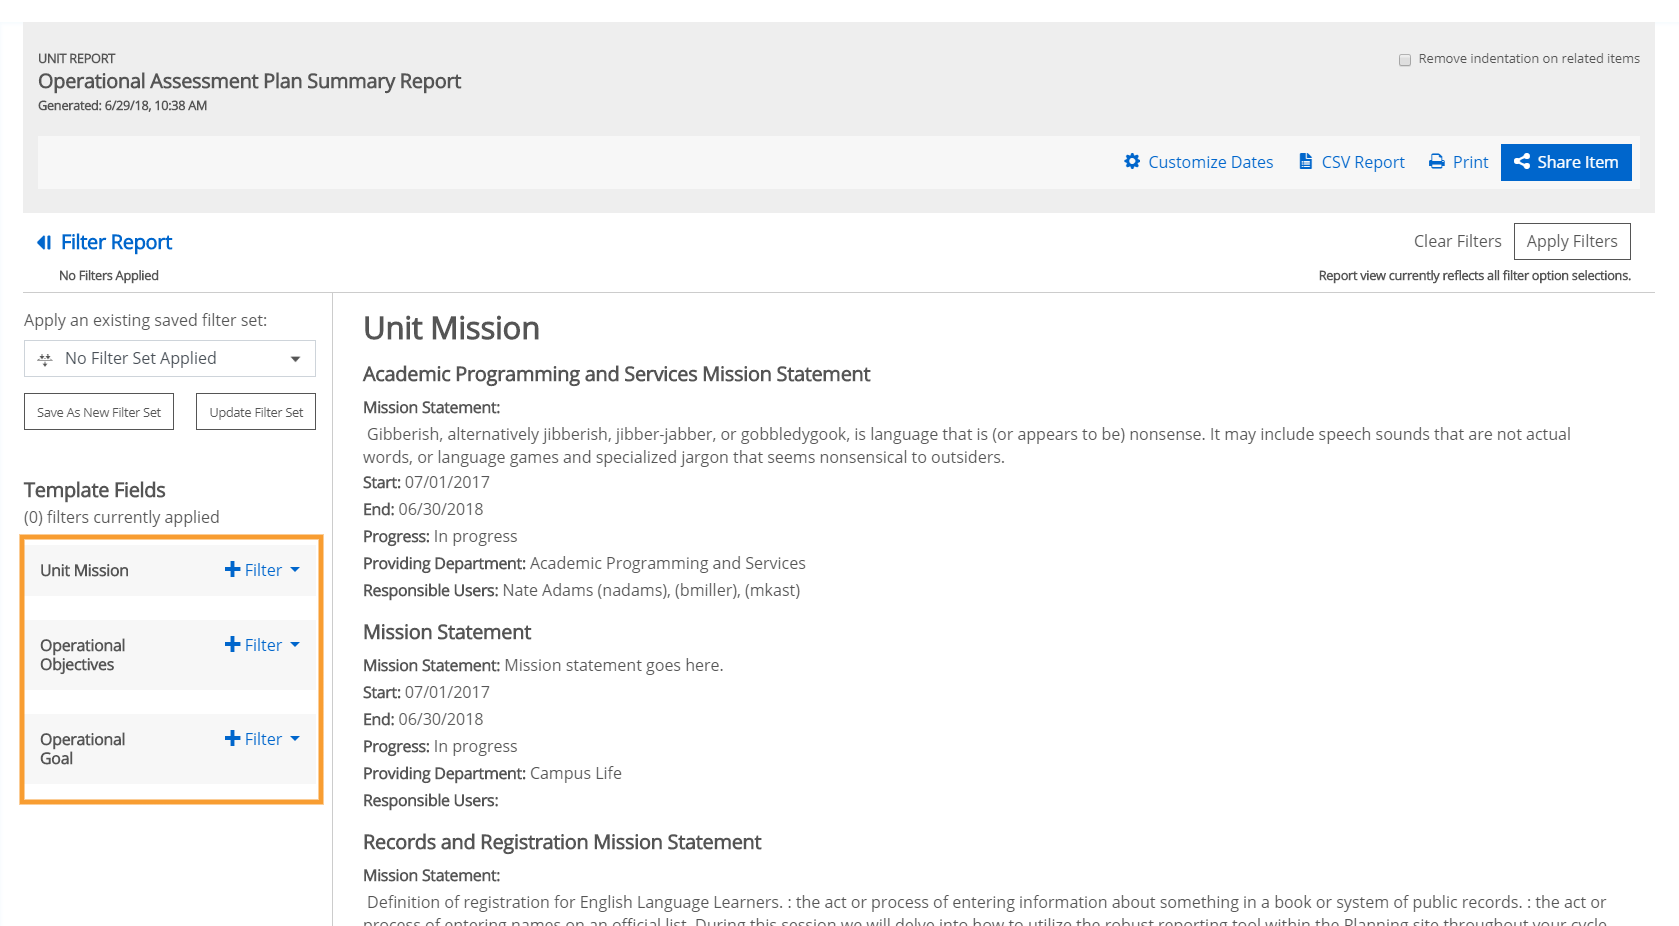
To add filters to a report, first click on the blue arrow on the top left-hand side of the report preview screen. This will reveal your filtering options.
 |
You will see all Primary Data templates listed in the filter bar along the left side of the screen. These are the templates to which filters can be applied. Related Data templates will not be included. From here you can select + Filter to choose a specific field to filter. Multiple filters may be applied to the same template.
 |
Once you have selected the field to which you would like to apply a filter you will next select the type of filter you would like to apply.Below you will find a summary of the different filters that can be applied to the various field types within Planning templates. Only the fields that are included within the template and in the report definition can have filters successfully applied.
Field Type | Filter Options |
Campus Labs Data Source | Is Empty, Is Not Empty |
Sources | Is Empty, Is Not Empty |
Large Rich Text Box | Is Empty, Is Not Empty |
Small Rich Text Box | Is Empty, Is Not Empty |
Text Box Single Line | Is Empty, Is Not Empty, Contains |
Confidence | Is Empty, Is Not Empty |
Description | Is Empty, Is Not Empty, Contains |
Name | Contains |
Number | Equals, Does Not Equal, Contains |
Start Date | Is Empty, Is Not Empty, Greater Than, Less Than |
End Date | Is Empty, Is Not Empty, Greater Than, Less Than |
Providing Org Unit | Is Empty, Is Not Empty, Equals, Does Not Equal, Contains |
Progress | Is Empty, Is Not Empty, Items Contain Any |
Choice | Is Empty, Is Not Empty, Equals, Does Not Equal, Items Contains Any |
Responsible User | Is Empty, Is Not Empty |
Currency | Is Empty, Is Not Empty |
True/False | Is Empty, Is Not Empty, Equals, Does Not Equal |
Percent Complete | Is Empty, Is Not Empty, Equals, Does Not Equal, Greater Than, Less Than |
Recipient Role | Is Empty, Is Not Empty, Search |
Role | Is Empty, Is Not Empty |
Date | Is Empty, Is Not Empty |
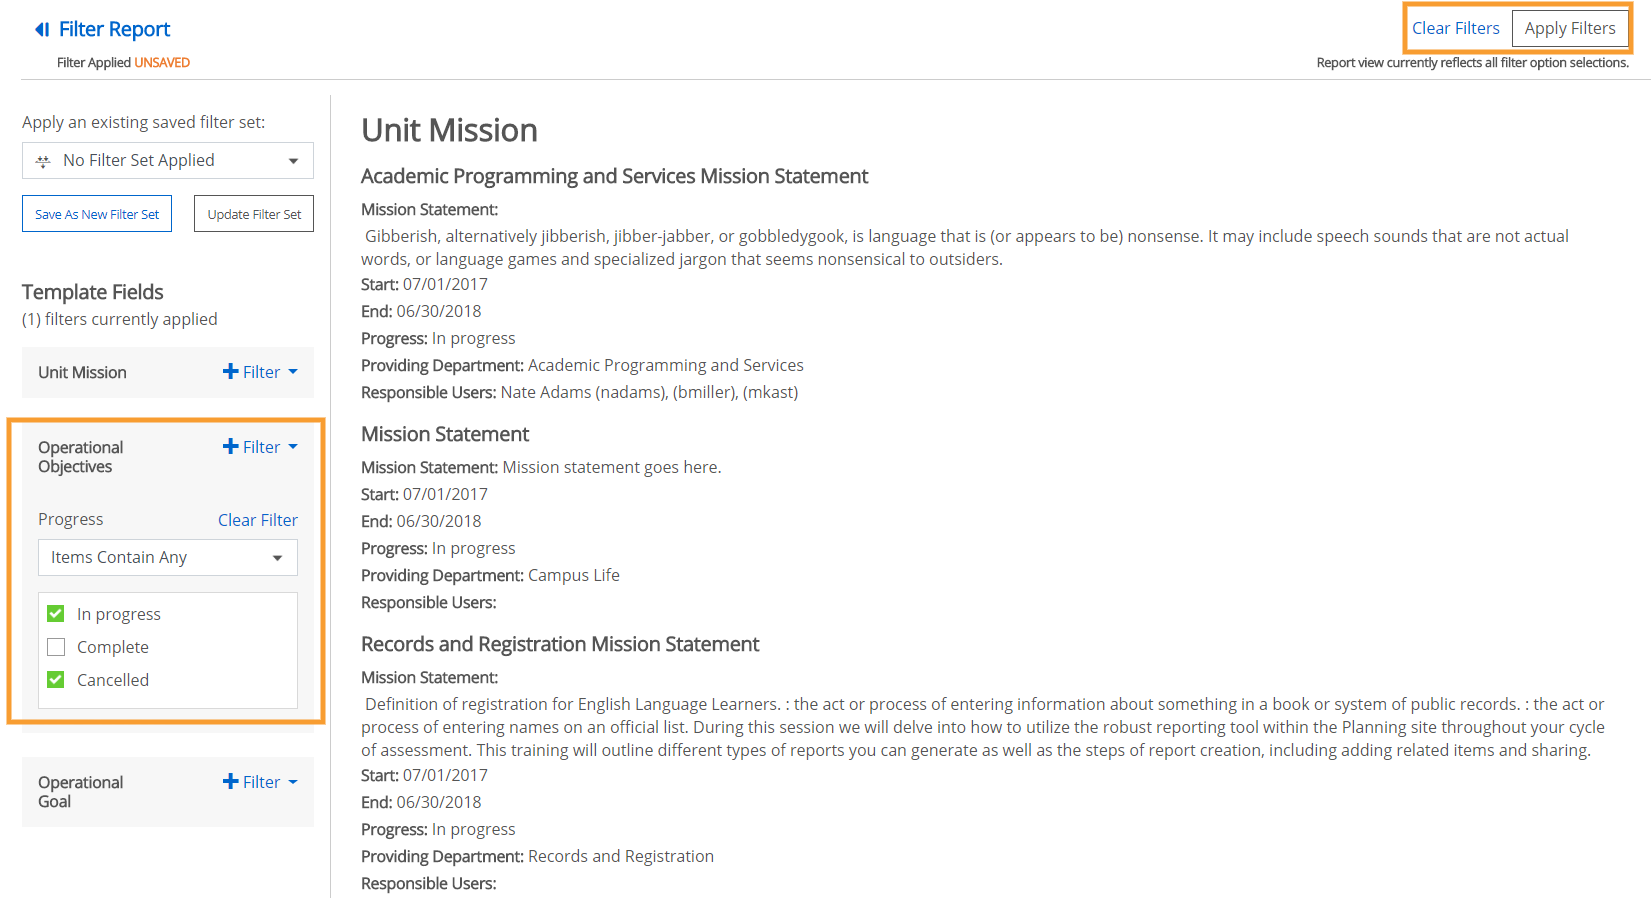
For example, if you wanted to see any Operational Objective items that are not marked as Complete, you would add a filter to the Progress field. Then you would select the Items Contains Any option. From there you can select the all the Progress indicators except Complete. Once you have the filter established, you will need to select Apply Filter . This will show you any Objectives that have a progress indicator other than Complete.
 |
Saving a Filter
After you apply a filter or set of filters to a report you created, you have the option to save that filter set. This will allow you to quickly access and apply those specific filters in the future. To save a filter set, select Save As New Filter Set . From there you will be asked to supply that filter set with a name. Be as specific as possible so you can easily identify this filter set in the future. Avoid generic names like “Test.”
 |
 |
Default Report Filter
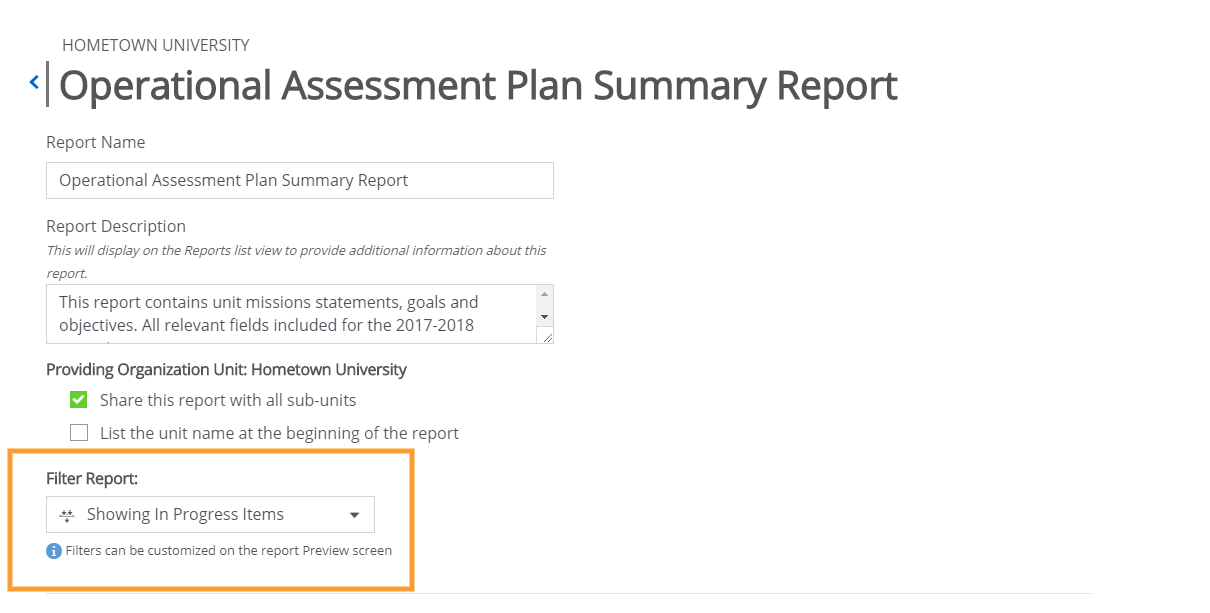
If you would like a saved filter set to be automatically applied when a report is generated, you can click on the report name to apply a default filter. Once you are within the report configuration screen simply select your preferred default filter from among the saved filters created for that report.
 |